After launching their new websites, many of my clients come back with the same question: How do I start my own blog? So, I decided to create a post dedicated to how to start a blog for those who have never published content online via their own blogs.
WordPress is considered one of the simplest to learn, user-friendly blogging platforms around today. I still have a couple of blogs of my own on the Blogger platform. But, I’ve found that WordPress allows users to have much more control over backend SEO and various features. So, for this blog post, I will walk you through how to start a blog using WordPress.
In this blog post, we will cover five basic steps to starting a blog:
- Choosing a domain name and web hosting plan
- Installing WordPress on your server for your blog
- Choosing a WordPress theme to customize the design and layout
- Adding webpages to your new website
- Writing, editing and publishing your blog post
1. Choose a Domain Name and Web Hosting Plan
- First, you’re going to need a domain name, also called a URL, such as contentmarketinggeek.com. Imagine that you’re leasing a home. Look at your URL as the street address to that house. Enter the address incorrectly, and you’ll arrive at the wrong location.
- Next you need a web host. This is the company that provides the storage space where your website is stored, or hosted. Look at this as the physical structure, the house, that you’re leasing. Without an actual house to live in on the lot, the address is useless. Having a domain name without web hosting is like leasing a parcel of land with no structure on it.
You can’t learn how to start a blog unless you try. And, you can’t try unless you have a place to blog.
How to Get a Domain Name and Web Hosting Package
When you buy a domain name, you buy it annually. You can purchase it for just one year, or up to ten years. Many web host companies offer URLs for free with the purchase of a web host package. Here are some of the most popular offers going on right now:
-
- 1and1 – 1and1.com is offering web hosting for as low as 99 cents per month for 12 months. That’s $11.88 for an entire year. It comes with a free domain name and an SSL Certificate for site security.
- HostGator – HostGator.com has web hosting packages for as low as $2.78 per month when you purchase multiple months/years at once. However, with HostGator, you can start your website for just 1 penny for the first month. Yes, just 1 penny!!! Either way, your URL is free.
- iPage – iPage.com currently offers web hosting for only $1.99 per month when you purchase an annual package for as low as $23.88 for a year. It comes with a free domain name and a free online store.
- GoDaddy – GoDaddy.com sells web hosting packages for as little as $1 per month when you purchase a 1-year plan. With GoDaddy web hosting, you get access to an award winning support team, 24 hours per day. This is one of the reasons GoDaddy is my favorite web host. Plus, of course you get a free URL with all web hosting plans. Click here to check it out.
How to Get Free Web Hosting from WordPress
If you’re not ready to invest in web hosting or a domain name right now, WordPress offers a free option. You can host your blog on the WordPress.com platform for absolutely free. Plus, you can have as many free blogs as you like on the same account.
And, moving your free WordPress blog over to a premium WordPress blog is extremely simple. We’ll help you when you’re ready to make the switch.
Learn how to start a blog using the WordPress.com free blogging platform free blogging platform.
2. Install WordPress for Your Blog
If you chose to go with paid web hosting for your blog, you’ll need to install WordPress. Each web host has a different procedure for doing this. So, be sure to choose a company with a comprehensive help guide and quality technical support, just in case.
- When installing WordPress, you’ll be asked where you want the software installed. Make sure you install WordPress on the root domain name for now. That way, your site can be accessed by going to www.yourdomainname.com, as opposed to www.yourdomainname.com/thisismyblog.
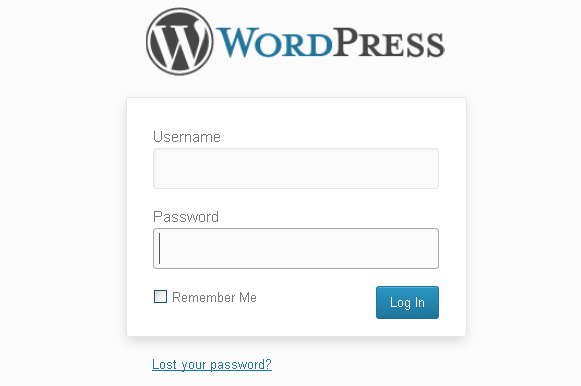
- You’ll also be asked to set up a username and password for your WordPress admin. Experts suggest not using “admin” as a username, as it’s the most common one tried by hackers. We also suggest using a password that includes at least one of each: upper case letter, lower case letter, number and special character.
- Once WordPress is installed, your web host will give you a URL in order to access the backend of your new WordPress blog. It will look something like this: yourdomainname.com/wp-admin. Use this link to “get into” your site, so you can customize it and start blogging.
Note: If you’re going with free web hosting from WordPress.com, there’s no need to install anything. Just move on to step 3. Either way, now it’s time to get into how to start a blog, and customize its look.
3. Customize Your WordPress Design & Layout
Now, you need to decide on the look and feel of your blog. Look at it as if you’re leasing the home from step 1, and the landlord is allowing you to choose the design and layout of the home. This is done by making changes within the Themes located within the backend of your WordPress blog.
Choosing a WordPress Theme
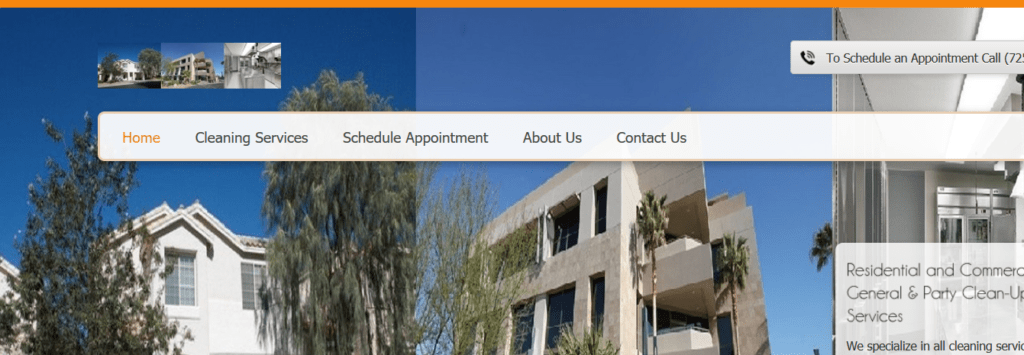
Choose a theme that not only looks good to you, but will be pleasing to the eyes of your intended or target audience. It should complement your niche, industry and the type of content (blog posts, images, etc…) you plan to publish. Remember that your readers may notice the look of your site before they even get a chance to check out its content. So, make sure it’s captivating.
When choosing a theme for your WordPress blog, make sure it’s a responsive theme. Responsive designs take note of the type of device a visitor is using when they land on a webpage. The size of the webpage is adjusted in response to the size of the device being used to view it. For example, a responsive theme will adjust one way for viewing on a 19-inch computer monitor, another way for a 6-inch tablet, and another way for a small cell phone screen.
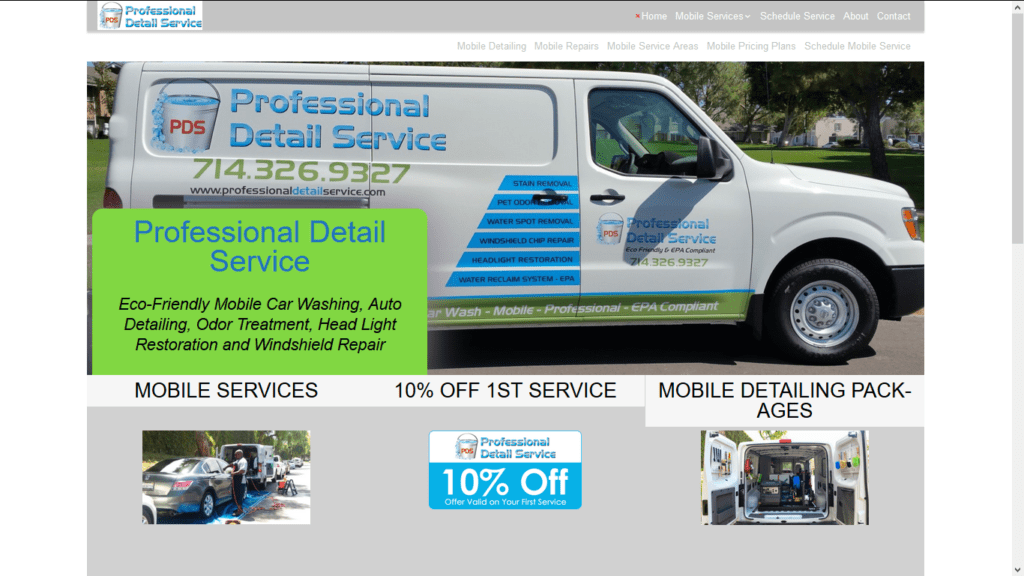
Image Source: professionaldetailservice.com
Add Your Branding to Your Blog
Once you’ve chosen a theme you like, customize it with your own logo, banner and favicon. Make it even more appealing by adding content, such as text, videos, images, widgets, social media icons, signup forms, etc…
Add SEO to Your WordPress Theme
Make sure Google and other search engines are able to find your site, and easily understand what it’s all about by adding valuable SEO keywords. Add relevant, widely used SEO keywords and meta data to your theme’s customization options (usually found by going to Appearance >>> Customize). Click here for SEO
4. Add Webpages to Your Website
Wondering what the difference is between a website and a blog? Well, basically, one pretty much stays the same, while the other changes regularly.
A website is a static site. In other words, once you add the information to the various webpages, you rarely change them. For example, once you’ve added content to your Home page, you may go in a tweak the look and feel a bit. You may even update it with special offers or new banner ads. But, you won’t change it much, and not very often.
Your blog, on the other hand, is a section of your site that you need to update regularly. Google and other search engines prefer to send traffic to sites that add fresh, new content on a regular basis. With each newly published blog post, you are doing just that.
How to Start a Blog with Static Webpages
Now that you understand the difference between a website and a blog, you need to add some webpages to your website. These are some of the most common webpages found on websites:
- Home
- Services/Products
- About Us
- Contact Us
- Privacy Policy
- Terms of Service
Add written content, images, videos, infographics, submission forms and clickable buttons to your various webpages. Also, be sure to add behind-the-scenes SEO keywords and meta data to each individual webpage of your site. Click here for help with SEO.
5. How to Start a Blog Post
You’ll need to access the backend of your site in order to learn how to start a blog post and start blogging. Your web designer should have given you the URL to “get into” your site, or your web host provided it when you installed WordPress. You can also log into your web hosting account to get the link again.
It will look something like this: yourdomainname.com/wp-admin. Use this link to access the backend of your site, so you can customize it and get started blogging.
Start Blogging
Now, it’s time to start blogging. These are step-by-step instructions on how to start a blog post using WordPress:
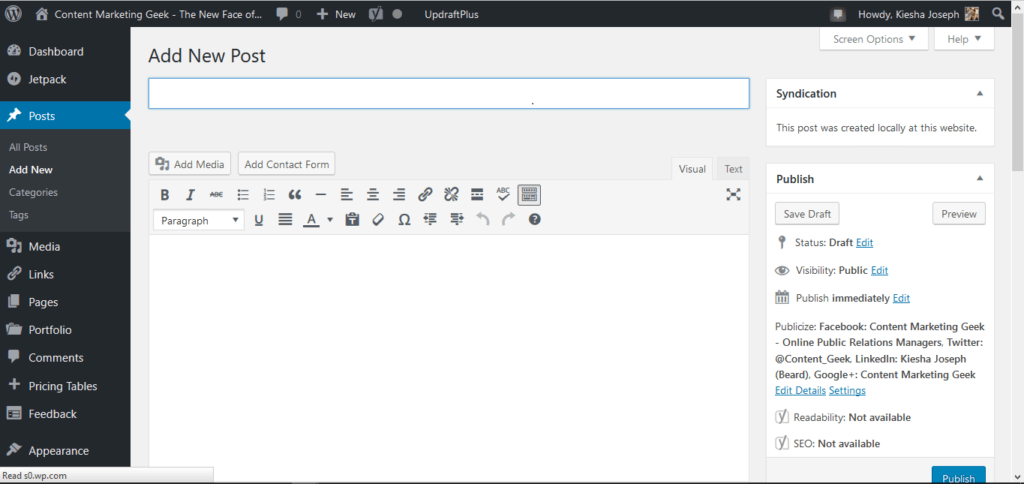
- Hover over “Posts”
- Click “Add New”
- Give your blog post a captivating title
- Type or copy/paste your blog post content into the space provided
- Use the buttons in the toolbar to edit your post (toggle the toolbar if no buttons exist)
- Use the “Insert/edit link” to add clickable URL links to your content
- Create sub-headings by clicking on the paragraph bar
- Set featured image (appears as main image of post and when post is shared)
- Publish your post by clicking the “Publish” button near the top right corner
Add Categories & Tags to Your Blog Post
Create new categories for your blog post. Once created, all you have to do is check the categories to add posts to them. For my blog, for example, some categories include content marketing tips, social media marketing tips, blogging tips, building your brand, step-by-step guides and SEO tips and tricks. Categories help users find posts related to specific topics. They also help boost your blog’s SEO.
Tags are much like categories, but they take it one step deeper. Let’s say you were browsing through my blog and came across the blog post SEO 2016: Introducing SEO with a Colorful Twist. You see that it’s in the “social media marketing” category, so you click it.
As you go through the various tags listed under that category, you come across Pinterest. You’ve always wanted to learn more about marketing on Pinterest. So, you click the tag, and there you find various blog posts related to social media marketing on Pinterest, specifically. Add tags to your blog posts using this method.
Basic Components of a Blog Post
How to start a blog post? Well, there is no right or wrong way to write a content to post on your blog. But, there are some common elements you may want to include for now until you develop your own way of blogging, such as:
- Headline – This is the title of your blog post. It may be seen in social media posts, in Google and other search results, in blog rolls, etc… So, make sure your headline is compelling enough so that users want to click and read.
- Introduction – Your opening paragraph should lure users in, and get them to want to read the rest of the post. Be sure to add your target SEO keywords within your introduction paragraph.
- Sub-Headings – Also, called sub-headlines, these break your content up into sections, so it can be quickly scanned by the naked eye. When blogging in WordPress, these are represented as Heading 1, Heading 2, Heading 3, etc…
- Visuals – At Content Marketing Geek Corporation, visuals are videos, images, infographics, photographs, cartoons, memes, presentations and other forms of media. Visuals also help to break up your content, while making your post look interesting. You must add SEO keywords and other ALT tag info to your images for better search engine performance.
- Main Content – This is the main part of your post. It needs to be relevant to your blog title, and satisfy all promises made, and answer all questions asked, during your introduction. For better search engine optimization, your blog posts should be no shorter than 300 words.
- Conclusion – End your blog post with a paragraph or two that sums up what readers should have gotten from the content. If they didn’t get the points you noted, they just may go back and read the post again to figure out what they missed.
- Call-to-Action – Your conclusion should include a call-to-action. This is the very last line of your post, which tells readers what you want them to do next. Some common calls-to-action for blog posts include:
- Share your thoughts in the comments below.
- Click here to place your order now.
- Contact us to schedule your free consultation today.
- Follow us on Facebook for daily updates.
- Join our mailing list to get offers and coupons from us.
Get Help with Blogging and SEO
The bottom line is… if you want your blog to grow into a successful platform, you must publish quality content and incorporate SEO keywords into that content. Stay focused on quality and consistency, rather than quantity and frequency for the best results. Check out this Guide to Starting a Blog for even more blogging tips and tricks for beginners.

Need help coming up with valuable content for your blog? Having a hard time implementing an effective SEO strategy for your website, blog and blog posts? Content Marketing Geek Corporation offers SEO services, web design packages, online marketing packages and blogging packages for entrepreneurs, real estate professionals, authors, bloggers and small business owners. Click here for package pricing.